

GIMP (GNU Image Manipulation Program) is a free and open-source raster graphics editor used for image retouching and editing, free-form drawing, converting between different image formats, and more specialized tasks.
GIMP is released under GPLv3+ licenses and is available for Linux, macOS, and Microsoft Windows.
Source: Wikipedia.
We can follow these steps to create borders in GIMP
- Open GIMP
- Press the
Ctrl Nto create a new image - Select the 640×480 template or whatever you want
- Press the
Rkey to activate the rectangle selection tool orEto activate the elliptical selection tool - Select a region within the image
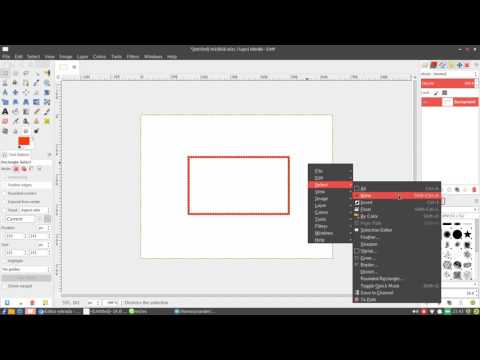
- Right click -> Select -> Border and specify the width of the border
- Press
Ctrl ,to color the border with the foreground color orCtrl .to color the border with the background color - Press
Ctrl Shit Ato turn off the selection.
Video about how to create border in GIMP
Thanks a lot!