
![]()
Seafile es una solución de sincronización y uso compartido de archivos, diseñada para brindar alta confiabilidad, rendimiento y productividad. Con Seafile puedes sincronizar, compartir y colaborar entre diferentes dispositivos y equipos. El núcleo del servidor Seafile está escrito en lenguaje de programación C, es pequeño y tiene un rendimiento excelente además presenta un cliente web desarrollado en Python/Django el cual permite administrar (agregar, compartir, eliminar) sus ficheros en la nube, también es posible instalar un cliente/drive el cual fácilita el manejo de sus ficheros desde la comodidad de su dispositivo.
Descargar
En el momento de ejecutar la instalación la versión disponible es la 8.0.4, vea Seafile descarga para obtener la última versión disponible.
$ wget https://s3.eu-central-1.amazonaws.com/download.seadrive.org/seafile-server_8.0.4_x86-64.tar.gz
Crear dir seafile dentro de /opt
$ sudo mkdir /opt/seafile
Copiar el fichero descargado a /opt/seafile
$ sudo mv seafile-server_* /opt/seafile
Moverse al DIR /opt/seafile
$ cd /opt/seafile
Descompactar
$ sudo tar -xzf seafile-server_*
Crear DIR installed
$ sudo mkdir installed
Mover el compactado a installed
$ sudo mv seafile-server_* installed
Crear bases de datos
Seafile usa MySQL o MariaDB como backend, le puede interesar:
- Como instalar MySQL 8.0 en Debian
- Cómo instalar MySQL 8.0 en Ubuntu 20.04
- Cómo instalar MySQL 5.7 en CentOS 7
- Cómo instalar MariaDB en Alpine Linux
- ADMINISTRAR MYSQL DESDE LA LÍNEA DE COMANDOS
create database `ccnet_db` character set = 'utf8';
create database `seafile_db` character set = 'utf8';
create database `seahub_db` character set = 'utf8';
Crear usuario para acceder a la BD
Vea MySQL Administración de usuarios.
create user 'seafile'@'localhost' identified by 'contraseña';
grant all privileges on `ccnet_db`.* to `seafile`@localhost;
grant all privileges on  `seafile_db`.* to `seafile`@localhost;
grant all privileges on  `seahub_db`.* to `seafile`@localhost;
flush privileges;
Cambiar método de autenticación
Si está teniendo problemas al connectarse a la BD es propable que tenga que cambiar el método de autenticación de MySQL, puede tener más detalles en:
MySQL 8.0, cambiar contraseña de root
ALTER USER seafile@localhost IDENTIFIED WITH mysql_native_password BY 'contraseña';
FLUSH PRIVILEGES;
Instalar dependencias Python
$ sudo apt-get install python3 python3-setuptools python3-pip libmysqlclient-dev -y
$ sudo pip3 install --timeout=3600 Pillow pylibmc captcha jinja2 sqlalchemy \
    django-pylibmc django-simple-captcha python3-ldap mysqlclient
Variables de entorno
Agregue la siguiente información al fichero /etc/environment
LC_ALL=en_US.UTF-8
LANG=en_US.UTF-8
LANGUAGE=en_US.UTF-8
export LC_ALL LANG LANGUAGE
haga un:
$ source /etc/environment
Instalar
Los desarrolladores de Seafile nos proveen e utilitario setup-seafile-mysql.sh que nos permite realizar el proceso de instalación de una manera sencilla y cómoda.
$ cd seafile-server-*
$ sudo ./setup-seafile-mysql.sh
Checking python on this machine ...

-----------------------------------------------------------------
This script will guide you to setup your seafile server using MySQL.
Make sure you have read seafile server manual at

        https://download.seafile.com/published/seafile-manual/home.md

Press ENTER to continue
-----------------------------------------------------------------


What is the name of the server? It will be displayed on the client.
3 - 15 letters or digits
[ server name ] files

What is the ip or domain of the server?
For example: www.mycompany.com, 192.168.1.101
[ This server's ip or domain ] files.midominio.local

Which port do you want to use for the seafile fileserver?
[ default "8082" ]

-------------------------------------------------------
Please choose a way to initialize seafile databases:
-------------------------------------------------------

[1] Create new ccnet/seafile/seahub databases
[2] Use existing ccnet/seafile/seahub databases

[ 1 or 2 ] 2

What is the host of mysql server?
[ default "localhost" ]

What is the port of mysql server?
[ default "3306" ]

Which mysql user to use for seafile?
[ mysql user for seafile ] seafile

What is the password for mysql user "seafile"?
[ password for seafile ]

verifying password of user seafile ...  done

Enter the existing database name for ccnet:
[ ccnet database ] ccnet_db

verifying user "seafile" access to database ccnet_db ...  done

Enter the existing database name for seafile:
[ seafile database ] seafile_db

verifying user "seafile" access to database seafile_db ...  done

Enter the existing database name for seahub:
[ seahub database ] seahub_db

verifying user "seafile" access to database seahub_db ...  done

---------------------------------
This is your configuration
---------------------------------

    server name:            files
    server ip/domain:       files.midominio.local

    seafile data dir:       /opt/seafile/seafile-data
    fileserver port:        8082

    database:               use existing
    ccnet database:         ccnet_db
    seafile database:       seafile_db
    seahub database:        seahub_db
    database user:          seafile


---------------------------------
Press ENTER to continue, or Ctrl-C to abort
---------------------------------

Generating ccnet configuration ...

Generating seafile configuration ...

done
Generating seahub configuration ...

----------------------------------------
Now creating ccnet database tables ...

----------------------------------------
----------------------------------------
Now creating seafile database tables ...

----------------------------------------
----------------------------------------
Now creating seahub database tables ...

----------------------------------------

creating seafile-server-latest symbolic link ...  done


-----------------------------------------------------------------
Your seafile server configuration has been finished successfully.
-----------------------------------------------------------------

run seafile server:     ./seafile.sh { start | stop | restart }
run seahub  server:     ./seahub.sh  { start <port> | stop | restart <port> }

-----------------------------------------------------------------
If you are behind a firewall, remember to allow input/output of these tcp ports:
-----------------------------------------------------------------

port of seafile fileserver:   8082
port of seahub:               8000

When problems occur, Refer to

        https://download.seafile.com/published/seafile-manual/home.md

for information.
Estructura de directorios
Una vez instalado el Seafile debemos tener una estructura de directorios como la que se muestra a continuación:
$ sudo tree -dL 3 /opt/seafile/
seafile/
├── ccnet
├── conf
│   └── __pycache__
├── installed
├── logs
├── pids
├── seafile-data
│   ├── httptemp
│   │   └── cluster-shared
│   ├── library-template
│   ├── storage/opt/
│   │   ├── blocks
│   │   ├── commits
│   │   └── fs
│   └── tmpfiles
├── seafile-server-8.0.4
│   ├── runtime
│   ├── seafile
│   │   ├── bin
│   │   ├── docs
│   │   ├── include
│   │   ├── lib
│   │   └── lib64
│   ├── seahub
│   │   ├── bin
│   │   ├── fabfile
│   │   ├── frontend
│   │   ├── locale
│   │   ├── media
│   │   ├── seahub
│   │   ├── sql
│   │   ├── static
│   │   ├── tests
│   │   ├── thirdpart
│   │   └── tools
│   ├── sql
│   │   ├── mysql
│   │   └── sqlite
│   └── upgrade
│       ├── sql
│       └── win32
├── seafile-server-latest -> seafile-server-8.0.4
└── seahub-data
    └── avatars
        └── groups
Configuraciones
Las configuraciones se encuentra en el directorio con en la estructura anterior
$ sudo tree /opt/seafile/conf
conf/
├── ccnet.conf
├── gunicorn.conf.py
├── __pycache__
│   ├── gunicorn.conf.cpython-37.pyc
│   └── seahub_settings.cpython-37.pyc
├── seafdav.conf
├── seafile.conf
└── seahub_settings.py
Iniciar los servicios
Iniciar el servidor de ficheros
sudo ./seafile.sh start
Starting seafile server, please wait ...
** Message: 17:02:24.029: seafile-controller.c(536): No seafevents.

Seafile server started

Done.
Iniciar el frontend
Ponga especial atención al correo y contraseña que le solicitan porque son las credenciales del usuario administrador y con el cual va a autenticarse en la interfaz web.
sudo ./seahub.sh start

Starting seahub at port 8000 ...

----------------------------------------
It's the first time you start the seafile server. Now let's create the admin account
----------------------------------------

What is the email for the admin account?
[ admin email ] info@seafile.local

What is the password for the admin account?
[ admin password ]

Enter the password again:
[ admin password again ]

----------------------------------------
Successfully created seafile admin
----------------------------------------

Seahub is started

Done.
Si tiene problemas ejecute
$ sudo ./seahub.sh start-fastcgi
Starting seahub (fastcgi) at 127.0.0.1:8000 ...
Traceback (most recent call last)
...
El comando anterior nos va a dar una idea de porque el frontend (seahub) no se inicia correctamente.
Resetear credenciales del usuario admin
En caso de que necesite resetear las credenciales del usuario admin ejecute el script reset-admin.sh
$ sudo ./reset-admin.sh
Mapear la interfaz web a una dirección IP y puerto específico
Por defecto la interfaz web solo está accesible via 127.0.0.1:8000 puede cambiar este comportamiento editando el fichero conf/gunicorn.conf.py y modificando la directiva bind.
# default 127.0.0.1:8000
bind = "IP:Puerto"
Reinicie filehub
$ sudo ./seahub.sh restart
Ahora puede acceder al Seafile poniendo en su navegador http://IP:Puerto.
Nota: Tenga en cuenta que exponer en una IP pública al servidor de aplicaciones Gunicorn conlleva riesgos de seguridad por tanto tal y como recomienda su doc lo mejor es desplegarlo detrás de un proxy como NGINX lo que haremos más adelante.
Instalar Memcache
Si su propósito es ofrecer el servicio a más de 50 usuarios instale Memcached lo que permitirá incrementar el rendimiento de la interfaz web.
$ sudo apt-get install memcached libmemcached-dev -y
$ sudo pip3 install --timeout=3600 pylibmc django-pylibmc
Iniciar Memcached con el Sistema Operativo:
$ sudo systemctl enable --now memcached
Usar Memcached.
Modifigue el fichero seahub_settings.py y agregue:
CACHES = {
    'default': {
        'BACKEND': 'django_pylibmc.memcached.PyLibMCCache',
        'LOCATION': '127.0.0.1:11211',
    },
}
Administrar los servicios usando systemd
Detener los servicios
$ sudo ./seahub.sh stop
$ sudo ./seafile.sh stop
Creamos el usuario y el grupo seafile
$ sudo adduser --system --group --HOME /opt/seafile --shell /usr/sbin/nologin --no-create-home seafile
Cambiamos el propietario del directorio de datos
$ sudo chown -Rc seafile:seafile /opt/seafile/seafile-data
$ sudo chown seafile:seafile -Rc /opt/seafile/seahub-data
Cambiamos el grupo del directorio de configuraciones
$ sudo chown :seafile -Rc /opt/seafile/conf/
Permitimos que el grupo pueda acceder al directorio de configuraciones:
$ sudo chmod g=rx -c /opt/seafile/conf/
Le damos permiso de escritura al dir de cache
$ sudo chmod g=rwx -c /opt/seafile/conf/__pycache__
Cambiamos el propietario del DIR de logs
$ sudo chown seafile:seafile -Rc /opt/seafile/logs/
Cambiamos el propietario del DIR pids
$ sudo chown seafile:seafile -Rc /opt/seafile/pids
Cambiar permisos a seahub_settings.py
Con el siguiente comando permitimos que el seahub acceda a su fichero de configuración.
$ sudo chmod g+r -c /opt/seafile/conf/seahub_settings.py
Permitir que el servidor RPC acceda a los ficheros sockets
El servidor RPC usa fichero sockets para ejecutar la comunicación entre los componentes, el siguiente error nos indica que debemos cambiar la configuración de permisos.
socket file exists, delete it anyway
delete socket file failed : Permission denied
Ahora cambiamos el propietario:
$ sudo chown seafile:seafile -Rc /opt/seafile/seafile-server-8.0.4/runtime
Crear las unidades systemd
Con el siguiente comando creamos una nueva unidad para el servicio seafile
$ sudo systemctl edit --force --full seafile
y copiamos el siguiente contenido
[Unit]
Description=Seafile Cloud Storage
After=network.target mysql.service

[Service]
Type=forking
ExecStart=/opt/seafile/seafile-server-latest/seafile.sh start
ExecStop=/opt/seafile/seafile-server-latest/seafile.sh stop
User=seafile
Group=seafile

[Install]
WantedBy=multi-user.target
Procedemos similarmente para el servicio seahub
$ sudo systemctl edit --force --full seahub
y copiamos el siguiente contenido
[Unit]
Description=Seafile Web System Administration (Seahub)
After=network.target seafile.service

[Service]
Type=forking
ExecStart=/opt/seafile/seafile-server-latest/seahub.sh start
ExecStop=/opt/seafile/seafile-server-latest/seahub.sh stop
User=seafile
Group=seafile

[Install]
WantedBy=multi-user.target
Iniciar el servicio seafile
$ sudo systemctl start seafile
Comprobar estado del servicio seafile
$ sudo systemctl status seafile.service
● seafile.service - Seafile Cloud Storage
   Loaded: loaded (/etc/systemd/system/seafile.service; disabled; vendor preset: enabled)
   Active: active (running) since Wed 2021-04-28 17:34:53 -05; 4min 43s ago
    Tasks: 18 (limit: 1147)
   Memory: 5.9M
   CGroup: /system.slice/seafile.service
           ├─2362 /opt/seafile/seafile-server-8.0.4/seafile/bin/seafile-controller -c /opt/seafile/ccnet -d /opt/seafile/seafile-data -F /opt/seafile/conf
           └─2364 seaf-server -F /opt/seafile/conf -c /opt/seafile/ccnet -d /opt/seafile/seafile-data -l /opt/seafile/logs/seafile.log -P /opt/seafile/pids/seaf-server.pid -p /opt/seafile/sea

Apr 28 17:34:50 debian10 systemd[1]: Starting Seafile Cloud Storage...
Apr 28 17:34:50 debian10 seafile.sh[2344]: Starting seafile server, please wait ...
Apr 28 17:34:50 debian10 seafile-control[2360]: seafile-controller.c(536): No seafevents.
Apr 28 17:34:53 debian10 seafile.sh[2344]: Seafile server started
Apr 28 17:34:53 debian10 seafile.sh[2344]: Done.
Apr 28 17:34:53 debian10 systemd[1]: Started Seafile Cloud Storage.
Iniciar el servicio seahub
$ sudo systemctl start seafile
Comprobar estado del servicio seahub
$ sudo systemctl status seahub
● seahub.service - Seafile Web System Administration (Seahub)
   Loaded: loaded (/etc/systemd/system/seahub.service; disabled; vendor preset: enabled)
   Active: active (running) since Wed 2021-04-28 17:41:13 -05; 2s ago
  Process: 2487 ExecStart=/opt/seafile/seafile-server-latest/seahub.sh start (code=exited, status=0/SUCCESS)
 Main PID: 2501 (python3)
    Tasks: 6 (limit: 1147)
   Memory: 58.6M
   CGroup: /system.slice/seahub.service
           ├─2501 python3 /opt/seafile/seafile-server-8.0.4/seahub/thirdpart/bin/gunicorn seahub.wsgi:application -c /opt/seafile/conf/gunicorn.conf.py --preload
           ├─2504 python3 /opt/seafile/seafile-server-8.0.4/seahub/thirdpart/bin/gunicorn seahub.wsgi:application -c /opt/seafile/conf/gunicorn.conf.py --preload
           ├─2505 python3 /opt/seafile/seafile-server-8.0.4/seahub/thirdpart/bin/gunicorn seahub.wsgi:application -c /opt/seafile/conf/gunicorn.conf.py --preload
           ├─2506 python3 /opt/seafile/seafile-server-8.0.4/seahub/thirdpart/bin/gunicorn seahub.wsgi:application -c /opt/seafile/conf/gunicorn.conf.py --preload
           ├─2507 python3 /opt/seafile/seafile-server-8.0.4/seahub/thirdpart/bin/gunicorn seahub.wsgi:application -c /opt/seafile/conf/gunicorn.conf.py --preload
           └─2508 python3 /opt/seafile/seafile-server-8.0.4/seahub/thirdpart/bin/gunicorn seahub.wsgi:application -c /opt/seafile/conf/gunicorn.conf.py --preload

Apr 28 17:41:08 debian10 systemd[1]: Starting Seafile Web System Administration (Seahub)...
Apr 28 17:41:08 debian10 seahub.sh[2487]: LC_ALL is not set in ENV, set to en_US.UTF-8
Apr 28 17:41:08 debian10 seahub.sh[2487]: Starting seahub at port 8000 ...
Apr 28 17:41:13 debian10 seahub.sh[2487]: Seahub is started
Apr 28 17:41:13 debian10 seahub.sh[2487]: Done.
Apr 28 17:41:13 debian10 systemd[1]: Started Seafile Web System Administration (Seahub).
Configurar el NGINX como proxy
-
Vea NGINX como proxy reverso para más información sobre como instalar y configurar NGINX como proxy reverso.
-
Vea Instalar certificado de seguridad Let’s Encrypt para que la comunicación entre el cliente y el servidor de ficheros sea segura.
Cree un virtual host y ponga la siguiente configuración, debe ajustar las directivas server_name, proxy_pass de acuerdo a su configuración.
log_format seafileformat '$http_x_forwarded_for $remote_addr [$time_local] "$request" $status $body_bytes_sent "$http_referer" "$http_user_agent" $upstream_response_time';
server {
    listen 80;
    server_name files.seafiles.local;

    # Put here your SSL
    # listen 443 ssl http2;
    # include snippets/intefid-ssl.conf;

    # Max file size useful for file uploading
    #
    client_max_body_size 200M;

    proxy_set_header X-Forwarded-For $remote_addr;

    location / {
        # NGINX acting as reverse proxy
        #
        proxy_set_header X-Forwarded-For $proxy_add_x_forwarded_for;
        proxy_set_header X-Forwarded-Proto $scheme;
        proxy_set_header X-Forwarded-Host $server_name;
        proxy_set_header X-Real-IP $remote_addr;
        proxy_set_header Host $host;
        #
        # Set the backend url and port, port is optional for standard services, the
        # $backend_port is defined as a map, see conf.d/mapper.conf also when there is
        # a variable as a part of proxy_pass URL a resolver is needed,
        # see conf.d/resolver.conf
        #
        proxy_pass http://127.0.0.1:8000;

        access_log    /var/log/nginx/seahub.access.log seafileformat;
        error_log       /var/log/nginx/seahub.error.log;
    }

    location /seafhttp {
        rewrite ^/seafhttp(.*)$ $1 break;
        proxy_pass http://127.0.0.1:8082;
        proxy_set_header   X-Forwarded-For $proxy_add_x_forwarded_for;

        proxy_connect_timeout  36000s;
        proxy_read_timeout  36000s;
        proxy_send_timeout  36000s;

        send_timeout  36000s;

        access_log      /var/log/nginx/seafhttp.access.log seafileformat;
        error_log       /var/log/nginx/seafhttp.error.log;
    }
}
Ahora puede poner en su navegador http://seafile.local

Login
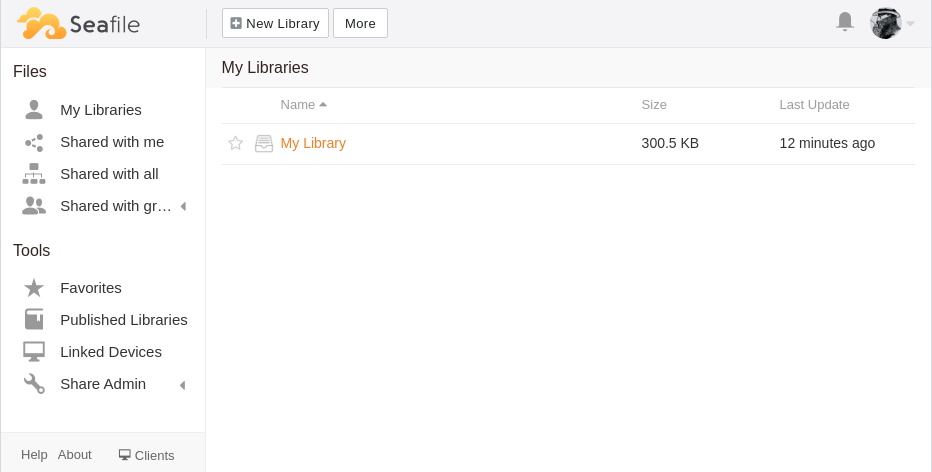
Library
Enlaces de interés